Showing posts with label technique. Show all posts

November 11, 2015

Hazy Day

I recently upgraded to Photoshop Elements 14.  There is a great deal going on at Costco - $40 off the regular price of the software!

There are a number of new features that I'm experimenting with - one of which is haze removal.  My original photograph taken in Banff, Alberta, Canada.

original photo with haze

 hazed removed

I think the software did a pretty good job removing the haze.


September 24, 2015

City Lights...

It's time to take a break from sewing.  I spent some time this afternoon playing with photos in Lightroom.

City lights on a cloudy day in Chicago.


Linking to:

August 18, 2015

Brother Can You Spare a Dime?

A man on the street was begging for money.  My husband being a generous man, gave him some.

Original photo taken in Charleston.


Linking to:

August 13, 2015

Tea Anyone?

Original photo taken in the Pavilion (second floor lobby) of the Langham Hotel in Chicago.  It is a gorgeous hotel and known to serve a lovely Afternoon Tea with Wedgwood, the traditional afternoon tea that first debuted at The Langham, London in 1865. Afternoon Tea with Wedgwood includes proprietary Langham teas, and an array of sweet and savory bites. 

The addition of a Topaz Labs filter made the beautiful glass globes suspended from the ceiling look like UFOs.

Mouse Over to see Original
Linking to:

Friday Finds
Friday Photo Journal
Weekly Top Shot
Photo Friday

June 11, 2015

Ginger

Something has been eating away at the ginger plants outside my door.  The plant is beautiful just the same.

Topaz Lab filters added to original photo.


Linking to:

May 8, 2015

Little bird...

Sweet little stone bird sculpture found on a house tour in San Miguel de Allende.

A Photoshop Elements action, decorative brushes, masks and vignette added to my original photo.

Enhanced photo

Original photo

Linking to:

September 2, 2014

a walk on the beach...

“The cure for anything is salt water - sweat, tears, or the sea.”
--Isak Dinesen

Original photo edited in Adobe Lightroom; Topaz Lab filters; texture and brushes added in Photoshop Elements 11.

"Frosted" texture courtesy of Kim Klassen.

Linking to:


August 22, 2014

Gone Fishing...

Another in a series of i-phoneology photos taken on the Naples beach.  Assorted textures, brushes and vignette added to original photo using my i-pad.  The texture is scrumptious - don't you agree?


Linking to:
Friday Finds
Friday Photo Journal
Weekly Top Shot


June 13, 2014

This Old House...

I found this old house while walking through the historic district of Fernandina Beach,  FL.

The "drawing" was created using Photoshop Elements filters.  It was fun to do and relatively easy.

Mouse Over to see Original
Linking to:
Friday Finds
Friday Photo Journal
Weekly Top Shot

April 11, 2014

Orchids

I brought my orchid plant indoors.  It looks so pretty sitting on an end table in my living room!

Mouse Over to see Original

Topaz "detail" filter as well as PSE "watercolor" filter and "canvas texture" added to my original photo.

Linking to:
Friday Finds
Friday Photo Journal
Weekly Top Shot

February 21, 2014

Kayak dreams...

Walking on the Naples beach, I came upon a kayak.  Oh, I dream of borrowing it and paddling in the gulf... 

I love the complimentary colors - orange kayak against the blue shadows on the sand.  (Watercolor filter added my original photo.)

Mouse Over to see Original
Linking to:
Friday My Town Shoot Out
Friday Finds
Friday Photo Journal
Weekly Top Shot
Super Sync Sunday

February 14, 2014

Reflections of love...

A dear friend of mine gave me a beautifully scented bar of soap.  The wrapping is so luscious, I can't bear to open it.  It will sit on a little shelf in the guest bathroom - the scent is sweet and light.

I attended a DPI-SIG women's workshop last week.  Christina Skibicki gave a talk on how she edits/alters some of her photos.  She also demonstrated how she made reflections of birds in water.


original photo

My method is a little different from Christina's, but generally the same.


Linking to:
Friday My Town Shoot Out
Friday Finds
Friday Photo Journal
Weekly Top Shot
Super Sync Sunday
Simple Things Sunday


May 5, 2013

Dolls, dolls and more dolls...

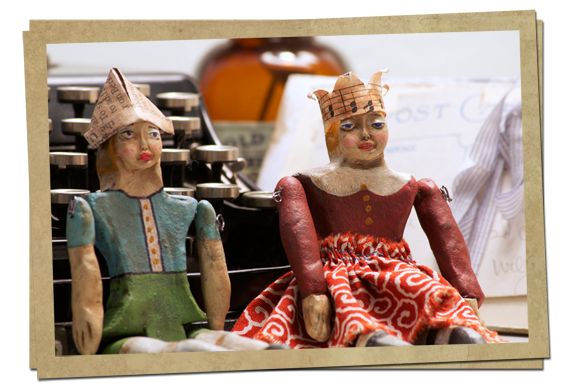
I love making dolls.  Working with paper clay is one of the materials I use and is the base for these two little sweet things.

This is my first effort making dolls in this fashion (notching out a space for legs and attaching with wire).  It was a learning experience for sure!  My holes on the crotch area and legs didn't match up as well as they should; unintended holes made with the wire trying to attach the limbs - it was a bit frustrating...


Hat and Crown made from assorted papers.  (Don't even ask how many tries it took before the tricorner hat fit!)  These dolls are quite small - measuring approximately 5" tall.


I had the honor recently of being published in Art Doll Quarterly.  


December 7, 2012

Hunt's Christmas stocking...

One never knows when a creative opportunity will arise.  I was asked by a woman (Marilyn) who came to my garage sale if I knew anyone who sews (seriously!).   "I sew" I replied.  "What do you need?"  She had a Christmas stocking that had been stitched by an unknown person and finished by an acquaintance.  She was in desperate need of getting the piece of needlework turned into a Christmas stocking - pronto! How could I possibly say "no"?

Here is the needlework (which needed blocking).   Pinned to foam core, spritzed with water and left to dry.  The stitches now pop and piece lies flat.  We're good to go.

 On the reverse side of stitchwork, a seam allowance was drawn with pencil.  Rights side together with supplied faux red velvet for back of stocking - but wait - she provided no fabric for a lining (lining, huh?)  Yes, of course, this puppy must be lined or all those yarns will show - no way, Jose!  Luckily, I have tons of fabric suitable for a lining.  Stitch the two stockings (original and lining) right sides at the top seam.  Looks weird - don't worry magic is about to happen.  Turn right sides out and blind stitch the "turning" seam on lining - voila!

Hunt's Christmas stocking looks vintage and is so precious.  I know Marilyn will be as happy with it as I am.

Now it's time for me to get back to work on my own Christmas gifts.

Linking to: 


January 27, 2012

TP Books...

This sweet little book was made with bits of paper, ribbon, yarn and toilet paper cores - waste not want not!!

I made quite a few of these books as Christmas gifts for family and friends.


I thought it would take a lot of time to gather enough TP cores to make the books - but we use more TP than I thought because it didn't take long before I had enough to start the project.  One thing I discovered is not all TP cores are the same size...different brands...different size!

Flatten the cores, cover with decorative paper (glue on); punch holes on one end.  My book contains three "pages".  Decorate pages with paint, clip art, lacy paper, etc.  I made small cards in Photoshop Elements - with poems or sayings - printed on water color paper; hole punched in center on one end, decorative ribbon threaded through hole.  These cards were inserted into the "pages".  Tie pages together using yarn or ribbon.
This was a relatively quick project.  Consider making one (or more) yourself the next time you need a small gift for someone special.


Linking to: 


January 6, 2012

My Jewelry Box...

I don't have a lot of expensive jewelry - mostly costume stuff - although I do have some beautiful gems my husband has presented me over time.  It was all crammed in a small jewelry box on my dresser.  I looked around to find something larger, but didn't have much luck.  I thought I'd make my own...

I found a 4 drawer chest I liked.  Added some wooden wheels as legs; primed, painted, collaged, stamped, etc.  I lined the drawers with black velvet.  It turned out nicely, don't you think?


Linking with:


December 29, 2011

coffre des affirmations

The New Year is looming before me.  It's a clean slate and I want to make the most of it.  I created this Chest of Affirmations to remind myself to be kind not only to others but to myself as well.

Whenever I feel sad or unsure of myself, I can open a drawer and pick out an affirmation - oh joy!


A base coat of gesso applied to 6 drawer chest then several coats of acrylic paint were applied sanding between coats; rubber stamped around the sides and top.  Wings made of a metal Christmas ornament - no easy task separating it into two pieces - but so perfect, don't you think?!  (I used Apoxie Sculpt for the first time and really like that stuff.)

The head is needle sculpted cotton t-shirt; alpaca for hair; crown made of paper-fabric and bling.

The drawers are stuffed with plenty of affirmations, ink-jet printed and aged.

This piece is a keeper - I love it so!

-Frames from DesignerDigitals
-Kim Klassen Textures

Linking to:

Pink Saturday
Texture Tuesday
Creative Exchange
Katherine's Corner
What's on Your Workdesk Wednesday
It's a Hodgepodge Friday
Inspire Me Fridays


December 24, 2011

Oh Christmas Tree...

I built my own Christmas tree.  (Actually I made several and gave them as gifts to dear friends.)  It was easy to do and they are adorable.


Drill hole in 2 inch wooden block.  Prime, paint and collage block; use E6000 to adhere glass pebbles on bottom of block for feet.  Attach assorted bits of paper, book pages, ribbon, lace, candy wrappers and the like on a 16 penny nail.  Build up layers and add a topper. I used a swizzle stick I saved from my recent cruise and added a bead.  Adhere the nail to the block using E6000 (insert in drilled hole).   Wait 24 hours for it to cure and voila! a Christmas tree!


October 28, 2011

What's in a name...

You may remember a while back I experimented with mashed potatoes as a resist for acrylic paint on fabric.  It is a relatively small piece of fabric.  I liked the colors and decided to make doll out of it.

created fabric

A pattern drawn to allow insertion of a 3/8" wooden dowel as armature for body.  Head made out of a styrofoam egg, covered with masking tape and then applied paper clay.  Arms made of created fabric, hands made of t-shirt fabric.  Face painted with acrylic paints.  Legs are vintage loom dowels painted, inserted into scrap wood and embellished; feet vintage castors adhered with E6000.  The doll breasts made of bottle caps; hair is painted cheesecloth.


I like to name my dolls, but haven't come up with an appropriate one for her.  I'd love your suggestions.

Visit Pink Saturday for more inspiration!

August 26, 2011

Birthday Greetings...

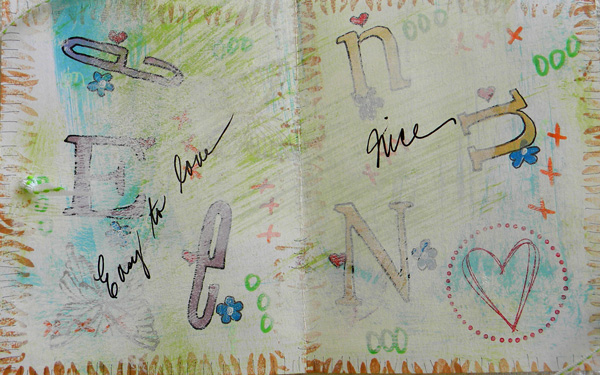
My dear daughter will be celebrating her birthday soon.  I made a special card for her - something fun and pretty - just like her!  This card is more like a little book.


 dry brush acrylic paints on card stock, fold paper as shown (flip paper over before second fold), cut down center of horizontal ditch fold

Fold paper on fold lines and decorate

Since "Jennifer" has 8 letters, I stamped each letter of her name on a page then wrote a descriptive word about her starting with that letter 


Punch two 1/8" holes (one on front and one on back page thread ribbon through and knot) tie in a bow.  One of the nice things about making a card this size, it will fit into store-bought 4-1/8 x 5-1/4 invitation envelopes.

Visit Pink Saturday for more inspiration!